24/7 without days off


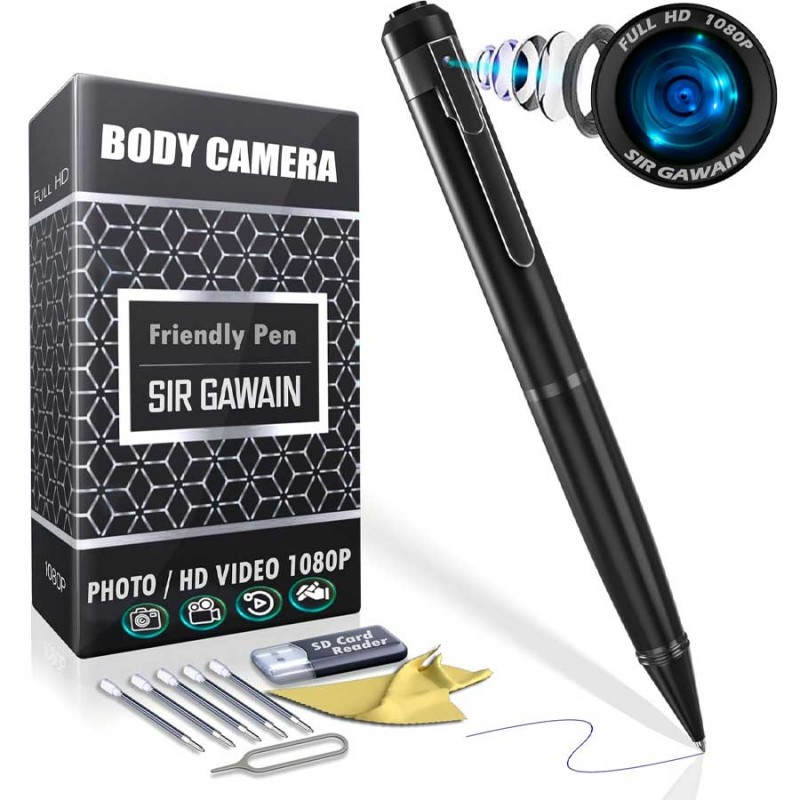
The SIRGAWAIN Body Camera Pen is your perfect companion for discreet recording, business meetings, or classroom use in Toronto. Designed with both form and function in mind, this 2-in-1 pen and Full HD camera offers seamless operation with just one click.
Capture crystal-clear 1080p video or snap 2560x1440 resolution photos anytime, anywhere. Its compact design fits effortlessly into your pocket or notebook, making it ideal for students, professionals, and anyone seeking reliable security without bulky equipment.
With built-in motion detection and loop recording, the SIRGAWAIN camera pen records only what matters, saving battery and storage. The rechargeable lithium battery offers up to 70 minutes of continuous use per charge — no Wi-Fi needed.
Plug-and-play compatibility with both Windows and macOS devices makes data transfer a breeze. No drivers, no complicated setups.
Included in the box: charging cable, SD card reader, 5 ink refills, cleaning cloth, ejector pin, and a multilingual user manual (English, Spanish, French).
Whether you're a student, journalist, executive, or security-conscious individual — the SIRGAWAIN Pen Camera gives you a discreet and stylish way to capture the moments that matter.
1. BATTERY CHARGE
To charge the pen camera, use a 5V power charger (1A or 2A) or connect the USB interface to a PC for charging. The red light will flash slowly when charging, and the red light will stop flashing and remain steadily on once the battery is full.
2. USING A MEMORY CARD (MICRO SD)
These instructions are regarding the use of a micro SD card in the pen camera. Our pen cameras support micro SD cards up to 128 GB 10 class (not included).
Before using, format the micro SD card in FAT32 (FAT-MAC). (In most cases, this step can be skipped.)
Insert the SD card into the pen camera's SD card slot. The card's electrical contacts should be directed to the micro USB port of the camera.
3. TURN ON / TURN OFF
ATTENTION: Turn the camera with the lens away from you and the control indicators towards you to follow the mode control.
Hold the power button at the top of the pen for about 2 seconds, when the green LED light turns on, the device is in standby mode. The pen camera will turn off within 60 seconds if the device is not being operated.
When the device does not find the TF memory card, it will flash a red light for 5 seconds and then shut down.
Hold the key for 3 seconds until the green light turns off. Once this happens, the device is turned off.
4. RECORD A VIDEO
Hold the power button for 2 seconds while the camera is in the standby mode, the green light will flash 3 times and the device will start recording. In the video mode, press the button once, the green light will turn on, and the device will save the recorded file, and turn back to standby mode. If you then press the power button for 2 seconds again, the Green light will flash 3 times and the recording will continue.
The video resolution is 1920x1080, and the pen camera is able to save up to ten minutes of video on the device using its internal memory.
5. TAKE A PHOTO
In standby mode, click the power button. Once you have done this, the Green light flashes one time, which indicates that it has already taken a photo and saved it. The picture resolution is 2560x1440.
6. MOTION DETECTION
In Motion detection mode the camera will record only detected movements. You can save disk space and avoid watching tons of video with no content.
NOTE! Make sure that the camera lens is directed at the area you want to record and that there is nothing interfering with the video recording.
To turn on the motion detection mode - in standby mode, quickly press the button 3 times. The Red indicator will blink 1 time and turn off.
To stop recording and return to standby mode, press the button 1 time.
7. TAKE VIDEO WHEN CHARGING
The red light will flash slowly when connected with a power charger. To record video while charging, hold the power button for 2 seconds, wait for the green light to flash 3 times, and then start taking video.
8. RESET
If the device does not respond to any of its buttons being pressed, insert a reset pin into the bottom hole under the indicator, press and hold for 5 seconds.
9. CONNECT TO PC
This device uses the Micro USB data cable, non-installation. Connect with Windows operating systems, Linux operating systems, Mac operating systems. You can read and modify the files on the device once connected to a PC.
10. TIME SETTING
The device offers the function of recording the time directly into each video. After the first recording, the device creates "time.txt" file. You should connect the camera to a computer and open the file "time.txt" to adjust the timestamp.
Data must be changed and saved manually. Next time, if you playback videos, the timestamp will display correctly.
11. REPLACEMENT OF BALLPOINT REFILL
First, untwist the handle of the pen camera. Next, use the included pin tool to unscrew and remove the ballpoint refill. Once remove, you can insert a new ballpoint refill and twist it into place.
Finally, reconnect the two halves of the pen camera.
There are no reviews for this product.
There are no reviews for this product, be the first to leave your review.